Introduction
We run some of our services in Docker container, under Elastic Beanstalk (EB).
We use circleci for our CI cycle.
EB, Docker and Circlec integrate really nice for automatic deployment.
It’s fairly easy to set up all the services to work together.
In this post, I am summarising the steps to do it.
About EB Applications and Versions
Elastic Beanstalk has the concepts of application, environments and application-versions.
The automatic steps that I describe here are up to the point of creating a new application-version in EB.
The actual deployment is done manually using Elastic Beanstalk management UI. I describe it as well.
Making that final step automatic is easy, and I will add a post about it in the future.
I am not going to describe the CI cycle (test, automation, etc.).
It’s a completely different, very important topic.
But out of scope for this post.
Connecting GitHub to circleci is out of scope of this post as well.
The Architecture
There are four different services that I need to integrate:
- circleci, which is the continuous integration (and deployment) service.
- docker-hub is where the Docker images are uploaded.
- AWS – Elastic Beanstalk (EB), which is an Amazon service that integrates well with Docker.
- AWS S3. Amazon storage service.
Basic Flow
Everything starts with push to GitHub.
(which I didn’t include in the list above).
Once we push something to GitHub, circleci is triggered and runs based on the circle.yml file.
The CI will create the Docker image and upload it to Docker-hub. We use private repository.
Next step, CI will upload a special json file to S3. This file will tell EB from where to get the image, the image and other parameters.
As the last step, for delivery, it will create a new Application Version in EB.
Process Diagram

CI Docker EB Deployment High Level Architecture
The description and diagram above are for the deployment part from CI (GitHub) to AWS (EB).
It doesn’t describe the last part for deploying a new application revision in EB.
I will describe that later in this post.
Permissions
The post describes how to work with private repository in docker hub.
In order to work with the private repository, there are several permission we need to set.
- circleci needs to be able to:
- Upload image to Docker-Hub
- Upload a JSON file to a bucket in S3
- Call an AWS command to Elastic Benastalk (create new application revision)
- AWS EB needs to be able to:
- Pull (get/list) data from S3 bucket
- Pull an image from Docker-Hub
I am omitting the part of creating user in GitHub, Circleci, Docker-Hub and AWS.
Docker authentication
Before we set up authentication, we need to login to Docker and create a dockercfg file.
dockercfg file
Docker has a special configuration file, usually named .dockercfg.
We need to produce this file for the user who has permissions to upload images to docker-hub and to download images.
In order to create it, you need to run the following command:
docker login
This command will create the file in ~/.docker/.dockercfg
If you want to create this file for a different email (user), use -e option.
Check: docker login doc
Important
The format of the file is different for Docker version 1.6 and 1.7.
Currently, we need to use 1.6 format. Otherwise AWS will not be able to connect to the repository.
“Older” Version, Docker 1.6
{
  "https://index.docker.io/v1/": {
    "auth": "AUTH_KEY",
    "email": "DOCKER_EMAIL"
  }
}
Newer (Docker 1.7) version of the configuration file
This will probably be the file that was generated in your computer.
{
  "auths": {
    "https://index.docker.io/v1/": {
      "auth": "AUTH_KEY",
      "email": "DOCKER_EMAIL"
    }
  }
}
The correct format is based on the Docker version EB uses.
We need to add it to an accessible S3 bucket. This is explained later in the post.
Uploading from Circleci to Docker Hub
Setting up a user in Docker Hub
- In docker hub, create a team (for your organisation).
- In the repository, click ‘Collaborators’ and add this team with write permission.
- Under the organisation, click on teams. Add the “deployer” user to the team. This is the user that has the file previously described.
I created a special user, with specific email specifically for that.
The user in that team (write permission) need to have a dockercfg file.
Setting up circle.yml file with Docker-Hub Permissions
The documentation explains to set permissions like this:
docker login -e $DOCKER_EMAIL -u $DOCKER_USER -p $DOCKER_PASS
But we did it differently.
In the deployment part, we manipulated the dockercfg file.
Here’s the part in out circle.yml file:
commands:
  - |
    cat > ~/.dockercfg << EOF
    {
      "https://index.docker.io/v1/": {
        "auth": "$DOCKER_AUTH",
        "email": "$DOCKER_EMAIL"
      }
    }
    EOF
Circleci uses environment variables. So we need to set them as well.
We need to set the docker authentication key and email.
Later we’ll set more.
Setting Environment Variables in circleci
Under setting of the project in Circelci, click Environment Variables.
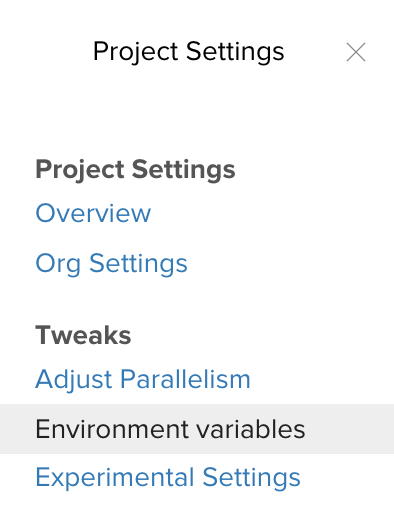
Settings -> Environment Variables
Add two environment variables: DOCKER_AUTH and DOCKER_EMAIL
The values should be the ones from the file that was created previously.
Upload a JSON file to a bucket in S3
Part of the deployment cycle is to upload a JSON descriptor file to S3.
So Circleci needs to have permissions for this operation.
We’ll use the IAM permission policies of AWS.
I decided to have one S3 bucket for all deployments of all projects.
It will make my life much easier because I will be able to use the same user, permissions and policies.
Each project / deployable part will be in a different directory.
Following are the steps to setup AWS environment.
- Create the deployment bucket
- Create a user in AWS (or decide to use an exiting one)
- Keep the user’s credentials provided by AWS (downloaded) at hand
- Create Policy in AWS that allows to:
- access the bucket
- create application version in EB
- Add this policy to the user (that is set in circleci)
- Set environment variables in Circleci with the credentials provided by AWS
Creating the Policy
In AWS, go to IAM and click Policies in left navigation bar.
Click Create Policy.
You can use the policy manager, or you can create the following policy:
{
    "Version": "2012-10-17",
    "Statement": [
        {
            "Sid": "Stmt1443479777000",
            "Effect": "Allow",
            "Action": [
                "s3:GetObject",
                "s3:ListBucket",
                "s3:PutObject"
            ],
            "Resource": [
                "arn:aws:s3:::MY_DEPLOY_BUCKET/*"
            ]
        },
        {
            "Sid": "Stmt1443479924000",
            "Effect": "Allow",
            "Action": [
                "elasticbeanstalk:CreateApplicationVersion"
            ],
            "Resource": [
                "arn:aws:elasticbeanstalk:THE_EB_REGION:MY_ACCOUNT:applicationversion/*"
            ]
        }
    ]
}
As mentioned above, this policy allows to access specific bucket (MY_DEPLOY_BUCKET), sub directory.
And it allows to trigger the creation of new application version in EB.
This policy will be used by the user who is registered in circleci.
AWS Permissions in Circleci
Circleci has special setting for AWS integration.
In the left navigation bar, click AWS Permissions.
Put the access key and secret in the correct fields.
You should have these keys from the credentials file that was produced by AWS.
Pull (get/list) data from S3 bucket
We now need to give access to the EB instances to get some data from S3.
The EB instance will need to get the dockercfg file (described earlier)
In EB, you can set an Instance profile. This profile will give the instance permissions.
But first, we need to create a policy. Same as we did earlier.
Create a Policy in AWS
{
    "Version": "2012-10-17",
    "Statement": [
        {
            "Sid": "Stmt1443508794000",
            "Effect": "Allow",
            "Action": [
                "s3:GetObject",
                "s3:ListBucket"
            ],
            "Resource": [
                "arn:aws:s3:::MY_DEPLOY_BUCKET",
                "arn:aws:s3:::MY_DEPLOY_BUCKET/*"
            ]
        }
    ]
}
This policy gives read access to the deployment bucket and the sub directories.
The EB instance will need to have access to the root directory of the bucket because this is were I will put the dockercfg file.
It needs the sub directory access, because this is the location were circleci uploads the JSON descriptor files.
Set this policy for the EB instance
In the EB dashboard:
- Go to Application Dashboard (click the application you are setting) ➜
- Click the environment you want to automatically deploy ➜
- Click Configuration in the left navigation bar ➜
- Click the settings button of the instances ➜
- You will see Instance profile
You need to set a role.
Make sure that this role has the policy you created in previous step. ➜ - Apply changes
Pull an image from Docker-Hub
In order to let EB instance be able to download image from Dockerhub, we need to give it permissions.
EB uses the dockercfg for that.
Upload dockercfg (described above) to the the bucket that EB has permission (in my example: MY_DEPLOY_BUCKET)
Put it in the root directory of the bucket.
Later, you will set environment variables in circleci with this file name.
Setting Up Circleci Scripts
After setting up all permissions and environments, we are ready to set circleci scripts.
Circleci uses circle.yml file to configure the steps for building the project.
In this section, I will explain how to configure this file for continuous deployment using Docker and EB.
Other elements in that file are out of scope.
I added the sample scripts to GitHub.
circle.yml File
Following are the relevant parts in the circle.yml file
machine:
  services:
# This is a Docker deployment
    - docker
  environment:
# Setting the tag for Docker-hub
    TAG: $CIRCLE_BRANCH-$CIRCLE_SHA1
# MY_IMAGE_NAME is hard coded in this file. The project’s environment variables do not pass at this stage.
    DOCKER_IMAGE: MY_ORGANIZATION/MY_IMAGE_NAME:$CIRCLE_BRANCH-$CIRCLE_SHA1

deployment:
# An example for on environment
  staging:
# The ‘automatic-.*’ is hook so we can automatically deploy from different branches.
# Usually we deploy automatically after a pull-request is merged to master.
    branch: [master, /automatic-.*/]
# This is our way for setting docker cfg credentials. We set project’s environment variables with the values.
    commands:
      - |
          cat > ~/.dockercfg << EOF
          {
              "https://index.docker.io/v1/": {
                  "auth": "$DOCKER_AUTH",
                  "email": "$DOCKER_EMAIL"
              }
          }
          EOF
# Sample for RoR project. Not relevant specifically to Docker.
      - bundle package --all
# Our Dockerfile.app is located under directory: docker-images
      - docker build -t $DOCKER_IMAGE -f docker-images/Dockerfile.app .
      - docker push $DOCKER_IMAGE
# Calling script for uploading JSON descriptor file
      - sh ./create_docker_run_file.sh $TAG
# Calling script for setting new application version in AWS EB
      - sh ./upload_image_to_elastcbeanstalk.sh $TAG
Template Descriptor File
AWS EB uses a JSON file in order to have information of docker hub.
It needs to know where the image is (organisation, image, tag).
It also needs to know where to get the dockercfg file from.
Put this file in your root directory of the project.
{
  "AWSEBDockerrunVersion": "1",
  "Authentication": {
    "Bucket": "<DEPLOYMENT_BUCKET>",
    "Key": "<AUTHENTICATION_KEY>"
  },
  "Image": {
    "Name": “MY_ORGANIZATION/<IMAGE_NAME>:<TAG>",
    "Update": "true"
  },
  "Ports": [
    {
      "ContainerPort": "<EXPOSED_PORTS>"
    }
  ]
}
The first script we run will replace the tags and create a new file.
The environment variables list is described below.
Script that manipulates the descriptor template file
Put this file in your root directory of the project.
#! /bin/bash
DOCKER_TAG=$1

# Prefix of file name is the tag.
DOCKERRUN_FILE=$DOCKER_TAG-Dockerrun.aws.json

# Replacing tags in the file and creating a file.
sed -e "s/<TAG>/$DOCKER_TAG/" -e "s/<DEPLOYMENT_BUCKET>/$DEPLOYMENT_BUCKET/" -e "s/<IMAGE_NAME>/$IMAGE_NAME/" -e "s/<EXPOSED_PORTS>/$EXPOSED_PORTS/" -e "s/<AUTHENTICATION_KEY>/$AUTHENTICATION_KEY/" < Dockerrun.aws.json.template > $DOCKERRUN_FILE

S3_PATH="s3://$DEPLOYMENT_BUCKET/$BUCKET_DIRECTORY/$DOCKERRUN_FILE"
# Uploading json file to $S3_PATH
aws s3 cp $DOCKERRUN_FILE $S3_PATH
Script that adds a new application version to EB
The last automated step is to trigger AWS EB with a new application version.
Using label and different image per commit (in master), helps tracking which version is on which environment.
Even if we use single environment (“real” continuous deployment), it’s easier to track and also to rollback.
Put this file in your root directory of the project.
#! /bin/bash

DOCKER_TAG=$1
DOCKERRUN_FILE=$DOCKER_TAG-Dockerrun.aws.json
EB_BUCKET=$DEPLOYMENT_BUCKET/$BUCKET_DIRECTORY

# Run aws command to create a new EB application with label
aws elasticbeanstalk create-application-version --region=$REGION --application-name $AWS_APPLICATION_NAME
    --version-label $DOCKER_TAG --source-bundle S3Bucket=$DEPLOYMENT_BUCKET,S3Key=$BUCKET_DIRECTORY/$DOCKERRUN_FILE
Setting up environment variables in circleci
In order to make the scripts and configuration files reusable, I used environment variables all over the place.
Following are the environment variables I using for the configuration file and scripts.
AUTHENTICATION_KEY – The name of the dockercfg file, which is in the S3 bucket.
AWS_APPLICATION_NAME – Name of the application in EB
BUCKET_DIRECTORY – The directory where we upload the JSON descriptor files
DEPLOYMENT_BUCKET – S3 bucket name
DOCKER_AUTH – The auth key to connect to dockerhub (created using docker login)
DOCKER_EMAIL – The email of the auth key
EXPOSED_PORTS – Docker ports
IMAGE_NAME – Every Docker image has a name. Then it is: Organisation:Image-Name
REGION – AWS region of the EB application
Some of the environment variables in the script/configuration files are provided by circleci (such as CIRCLE_SHA1 and CIRCLE_BRANCH)
Deploying in AWS EB
Once an application version is uploaded to EB, we can decide to deploy it to an environment in EB.
Follow these steps:
- In EB, in the application dashboard, click Application Versions in the left nav bar
- You will see a table with all labeled versions. Check the version you want to deploy (SHA1 can assist knowing the commit and content of the deployment)
- Click deploy
- Select environment
- You’re done
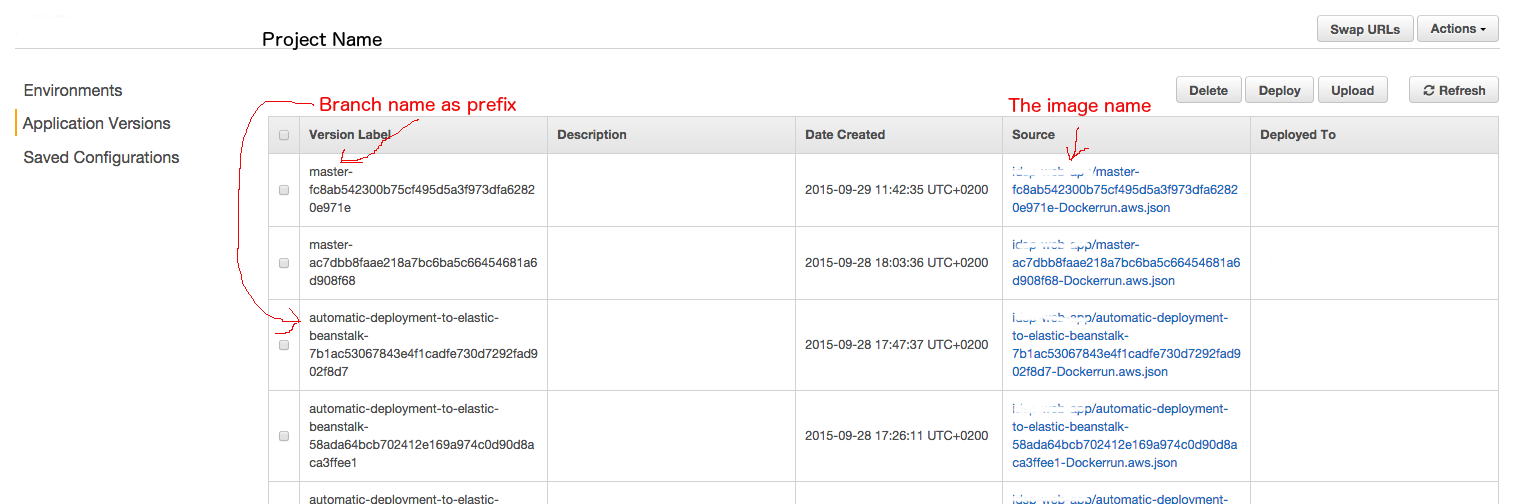
AWS EB Application Versions
Summary
Once you do a setup for one project, it is easy to reuse the scripts and permissions for other projects.
Having this CD procedure makes the deployment and version tracking an easy task.
The next step, which is to deploy the new version to an EB environment is very easy. And I will add a different post for that.
Edit: This is helpful for setting AWS permissions –
https://gist.github.com/magnetikonline/5034bdbb049181a96ac9